Start Brewing
Home brew beer - a beginner’s guide to making your own beer
Home brew beer is both fun and rewarding. Think about it – if you get a project car, you make a mess and get told off. If you get into making home brew, you might still make a mess but at least you can promise a cold glass of your very own beer at the end of it. Not only that, home brew is cheap to make, it’s impressive when you have your mates round, and you’re in complete control of what goes into your beer. So no weird chemicals and preservatives, and you can adjust the malt, hops, and yeast to suit your own taste.
How to get started with home brew: home brew supplies
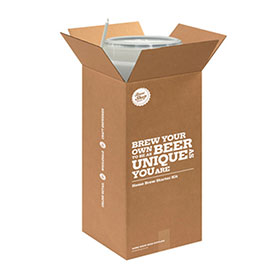
 The best way to start your exploration into home brew is by using a starter kit. These contain all the home brew supplies and equipment you’ll need to brew your beer, as well as detailed instructions.
Malt & hops & yeast (oh my!): the ingredients that go into home brew beer
Beer is surprisingly simple stuff. It’s just water with malt added to give the sugar that the yeast feeds off, creating alcohol and carbon dioxide. Hops give it additional flavour. All the ingredients come in the home brew starter kits, but once you get more adventurous you can start experimenting with enhancers, hops and different malts and grains to flavour your home brew.
Brewing with home brew kits
Making home brew is about as easy as buying a crate, especially with a kit, and way more fun. Your basic steps to home brew beer:
- Brewing (about 2 hours) – clean and sterilise all your equipment first. Dissolve your brew in 2-4 litres of very hot water, and add 1kg of sugar or dextrose. Put about 10 litres of cold water in your fermenter, add the hot mixture, and mix well. Top it up to 23 litres and sprinkle with brewers’ yeast when the temperature is below 30°.
- Fermenting (about a week) – now the magic happens! After you add the yeast, seal the fermenter and partly fill the airlock with boiled, cooled water. Let the brew ferment for about a week at a constant temperature – about 20-22° will do it. Once the airlock stops bubbling and the brew clears, leave it for another 48 hours, and it’s time to move on to bottling! Alternatively, a better way to know the progress of your beer is to draw off a sample and take a hydrometer reading - if it's close to the expected reading and static for more than 24 hours then it's ready for bottling.
- Bottling – sterilise your bottles and caps. Add a teaspoon of sugar to each bottle, and using the bottling valve, fill each bottle to 40mm below the top. Cap the bottles and gently tilt them a few times to help dissolve the sugar. Store them in a warm place for five days, then move them somewhere a bit cooler for another five. Give them another week, and try your beer! To check how your home brew matures, sample at three weeks, three months, and six months. If it lasts that long.
Improving your home brew beer
Not quite right first time? Part of the fun of home brew is experimentation. You could try adding more hops or malt, upgrading your yeast, or using an enhancer pack. Or if you’re really up for the challenge, have a go at extract or all-grain brewing.